 240 Volvo:
Replacing the Brake Light Switch (1991
240 Volvo:
Replacing the Brake Light Switch (1991 US
Prep
You're probably here because you are certain your brake light switch needs to be changed. The switches have been very reliable for me, so I would approach this job very reluctantly unless all other possibilities are ruled out. I changed this one because it was making an annoying squeaking sound, and that was what my daughter was complaining of. Well, it turned out the squeak she was hearing was one from a binding brake pad that would show up after 10 or 15 miles of warming up. But the question of how to get at this switch comes up quite frequently from the Volvo enthusiast group, so I relished the chance to get some pictures.
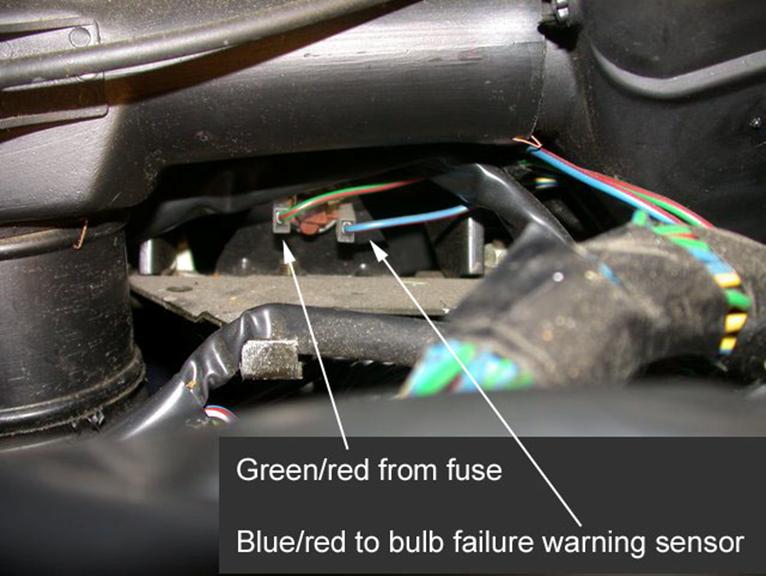
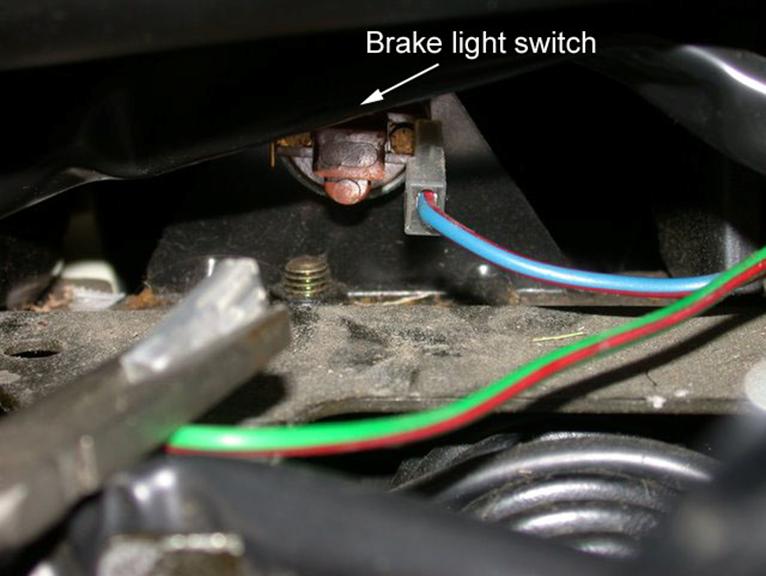
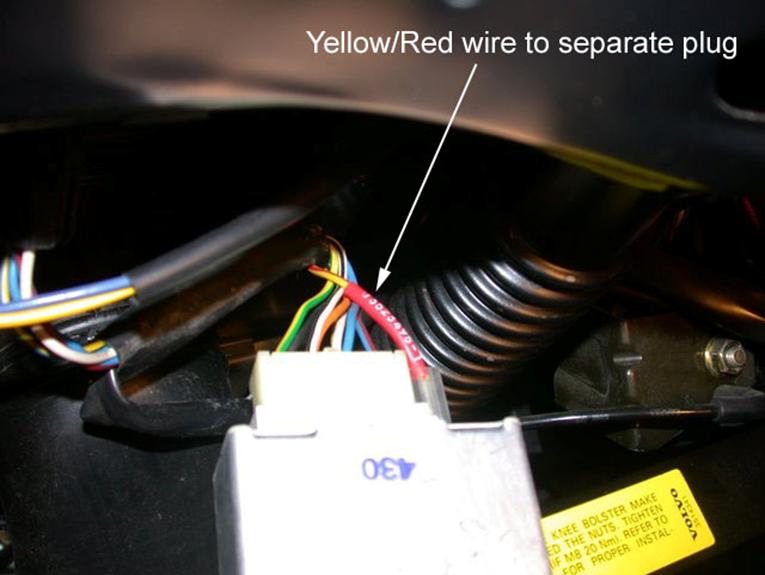
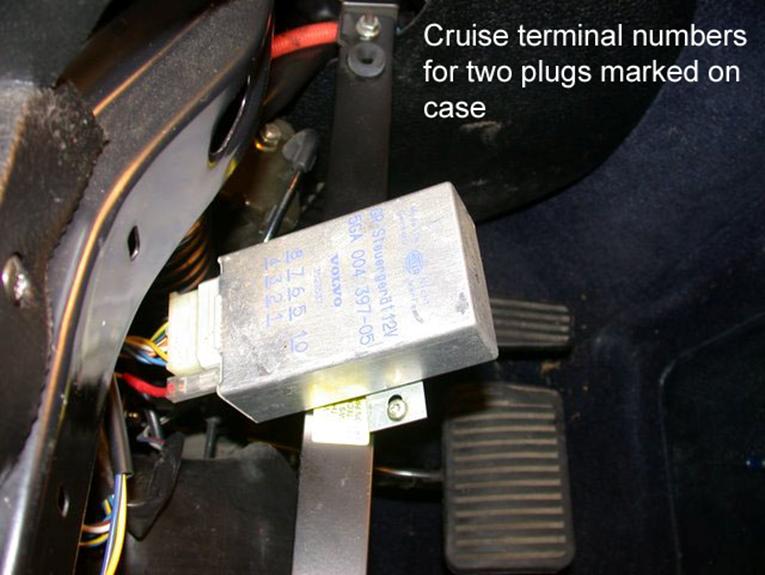
The brake light circuit is basically the same throughout the 19 years of 240 production, but getting at this switch got more complicated with airbags, ABS and cruise. Let me list some of the differences I'm aware of: Beginning in '86, the high mounted brake light added a requirement for a third sense coil in the Bulb Failure Warning Sensor as well as the increased current through the fuse, contacts, and switch. Between 83 and 93 Volvo used 3 different cruise control systems, each of them sensing the brake light switch. The circuitry of the cruise controllers, and in '91, the ABS controller, senses brake pedal use at the switch. This means using a multimeter or LED test light to probe the switch for power may mislead one into thinking a small current useful for sensing the pedal is sufficient to operate the brake lights.
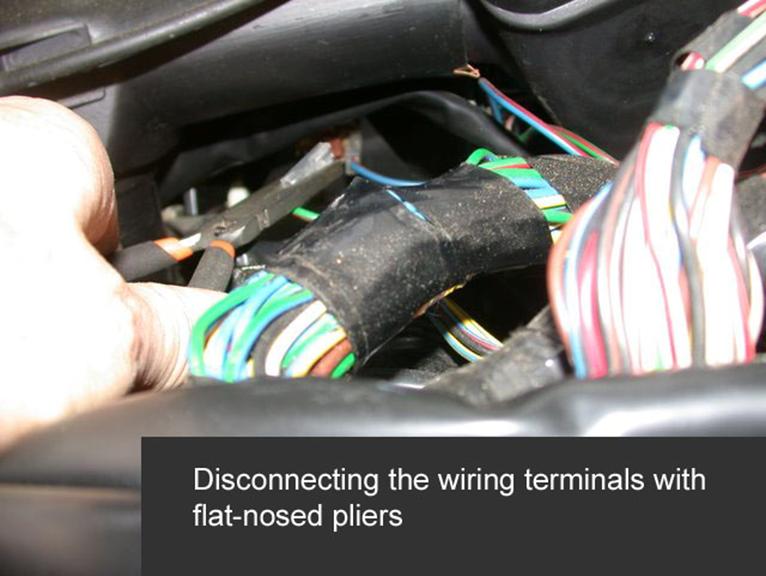
Although I could not avoid the contortions of working with my head above the floor mat (to remove the cruise box), I pulled the instrument cluster, as well, for the ability to take photos impractical from underneath. With this access, I also pulled the electrical connections, but this would be a successful approach to verifying the switch absolutely needs to be changed for an electrical problem: First the connectors would be reseated, in case the terminals are merely a bit corroded or loose. Then a test light or meter probe right at the switch can verify the circuit is still open with the pedal down. If you decide to have this view, some notes on removing the cluster are here: Temp Faker
Replacement
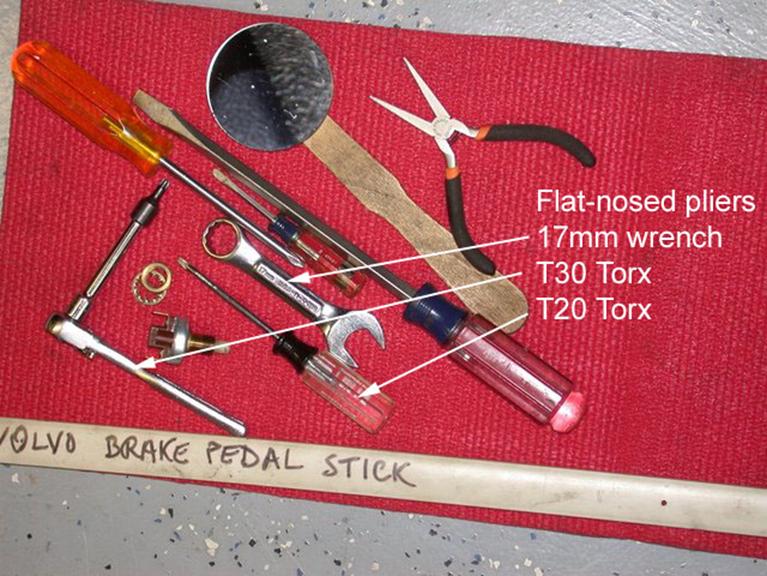
You might disconnect the switch from above or below, but getting at its mounting is a below job. What I found helpful was working with one arm from above and the other from below, rather than spending more time with my knees locked over the front seat back. Take a good lamp with you and remove the felt covering the bottom of the dash.
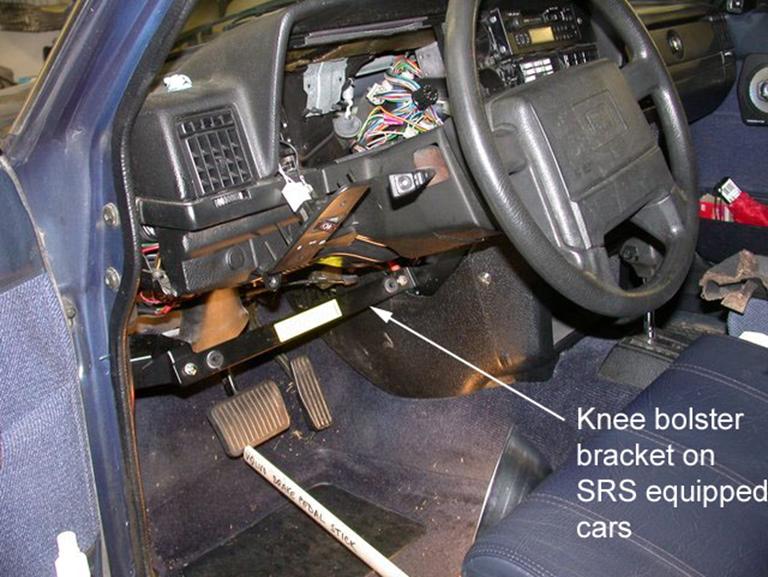
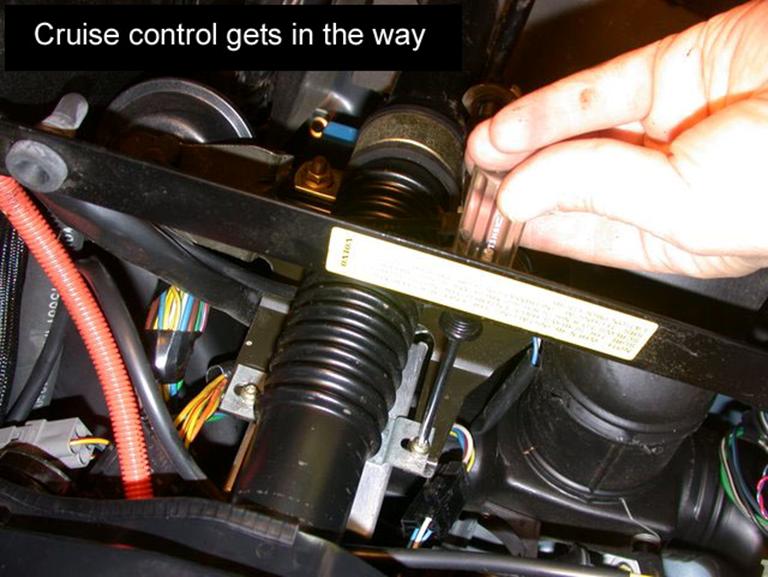
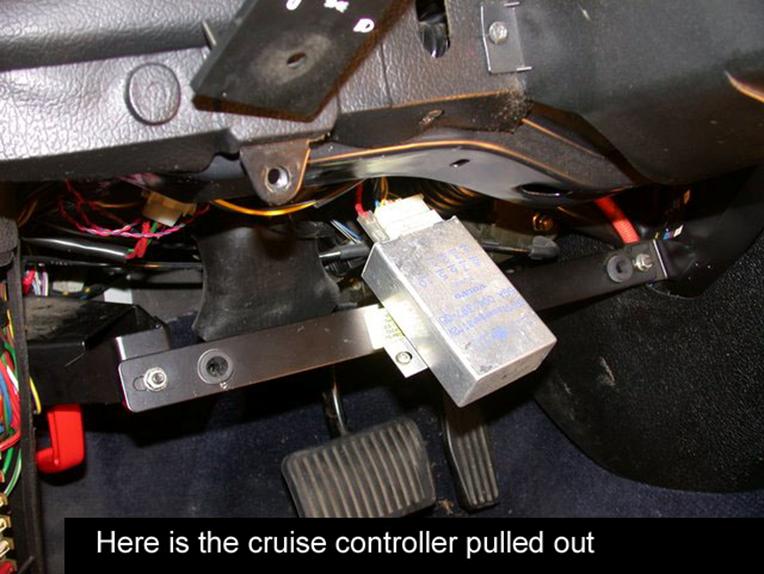
If yours is an airbag-equipped car, the knee bolster needs to come out. There are two plastic plugs hiding the T30 bolts attaching the knee bolster to its bracket, and two pins that locate the bolster in rubber sockets on that bracket. If it also has cruise, the controller is right in the way and comes out with two T20 screws. Chris reports using a T40 tool for the knee bolster and a T25 on the cruise.
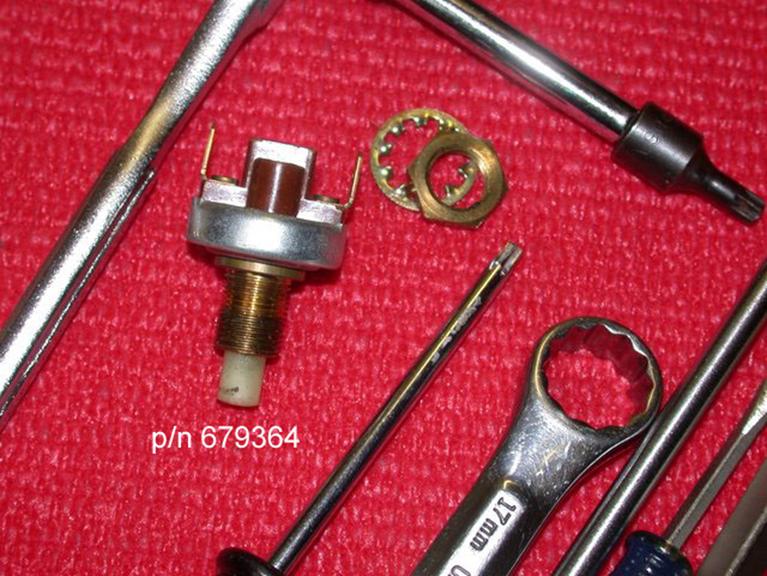
Once you see the switch from underneath, a shorty 17mm open-end wrench only needs one turn to loosen the nut on the switch, after which it just spins off with a fingertip.