Notes on 240 Volvo Windshield Replacement
These notes generally apply to 1979 through 1993 240s except Bertone Coupe, taken from my family fleet
experiences with the following:
79 244DL, 83 244DL, 83 242Ti, 83 244Ti, 84 244DL, 89 245GL,
89 244 GL, 90 244, 91 244DL, 91 244GL
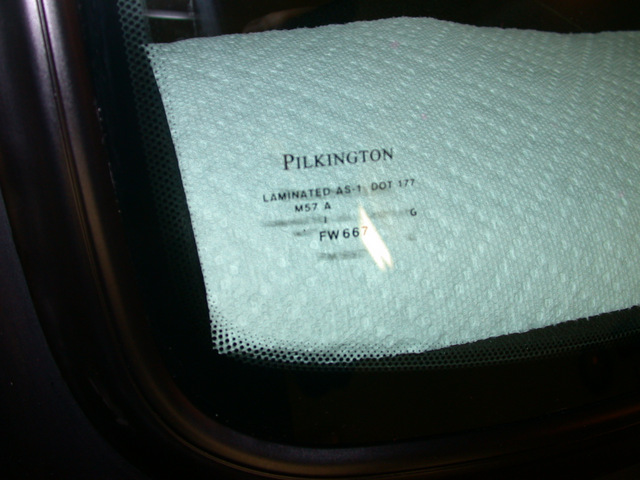
Notes on two jobs are found on this page. The first, done in 2011, involves rust repair and a professionally urethaned FW667 (91+ style) into an 1989 245 . The second, was done in 2017, needed no rust repair, and represents a DIY butyl tape installation of an FW404 (-90 style) into a 1979 244.
Symptoms
We keep cars until rust makes them unsafe to drive.
In April, 2000, we purchased this 1989 245GL from the original owner with 132K miles experience.
It had shiny green/blue (402) paint and supple leather upholstery. By May we discovered the corrosion on the
fuses and fuse panel was caused by a leaky windshield.
Stalling Proper Repair
Not knowing much about these cars, I picked up a clip kit at the dealership and started removing the anodized aluminum trim
covering the gap around the windshield edge. Expecting butyl rubber, I found the clips all set into hardened polyurethane applied
to a replacement window installed on the PO's watch.
So, I bought a tube of polyurethane in black, and caulked the opening as neatly as I was able and left it without the trim
for the day I would eventually do the job right. It wasn't pretty, but no one was complaining, and the fuse panel stayed dry.
Temporary Repair Fails
It stayed dry. Until 2011. Eleven years later the wetness returned. Heavy rain brought wet carpet, flaky speedometer, and drips from the upper trim.
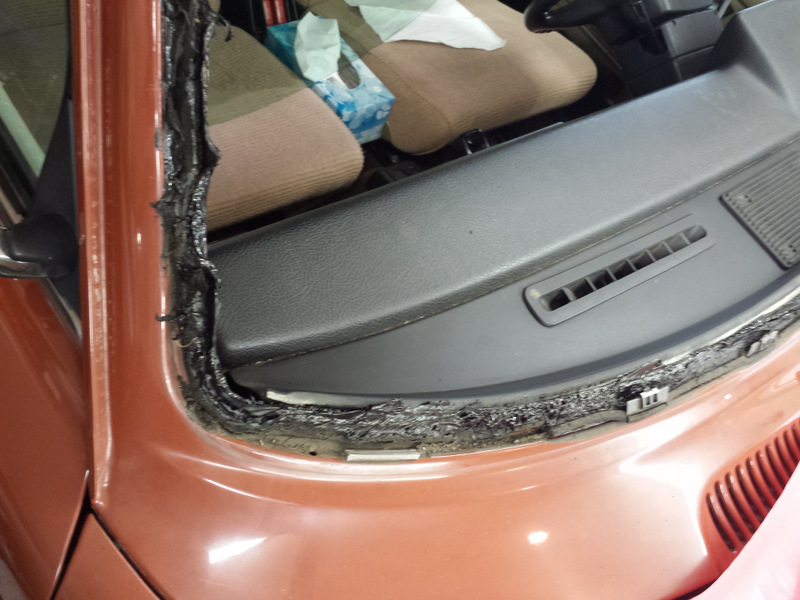
I pulled the sun-dried polyurethane caulking out and decided to fix it right, expecting a fight to cut through the hardened sealant and
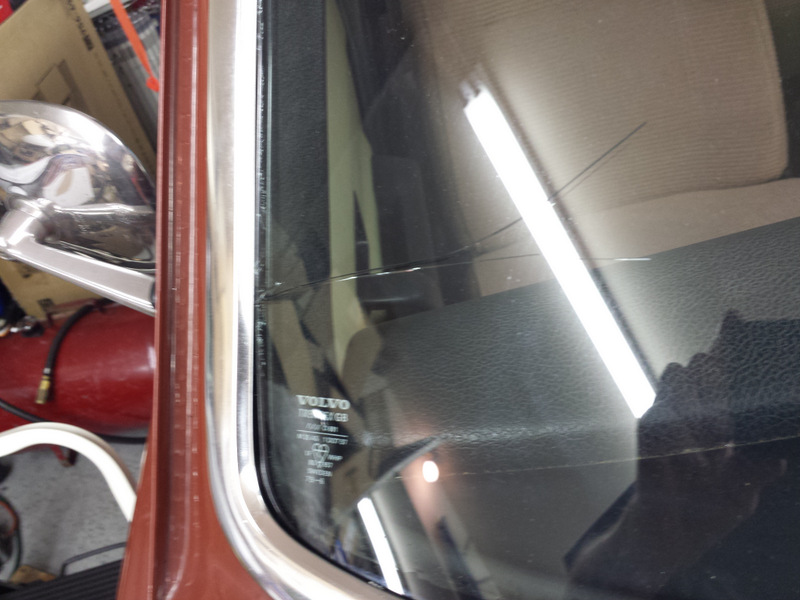
no hope or desire to save the old glass which had suffered a great deal on the passnger side, from a lost wiper blade incident.
Turned out the glass wasn't stuck in there at all. Pushed out easily by hand.
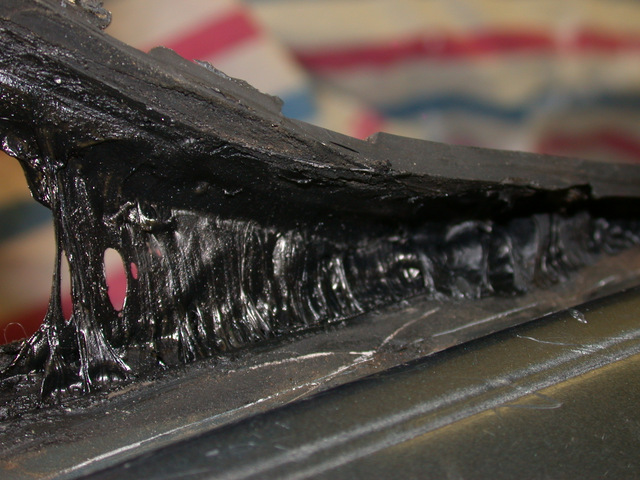
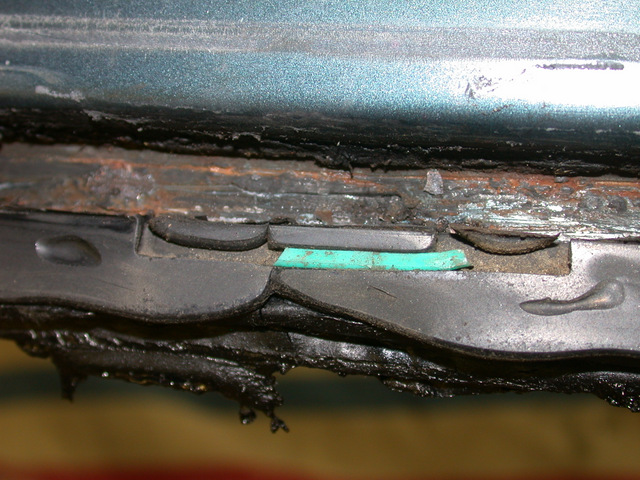
The mystery of the easy removal was quickly resolved when I saw the urethane used by the auto glass installer was used without cleaning the
original butyl sealant from the pinchweld. In fact, it looked as though there wasn't even the slightest attempt to remove the bulk of it.
Very little of the urethane had bonded to metal, and, if the glass was primed for adhesion at all, there was no evidence it stuck to the glass
either.
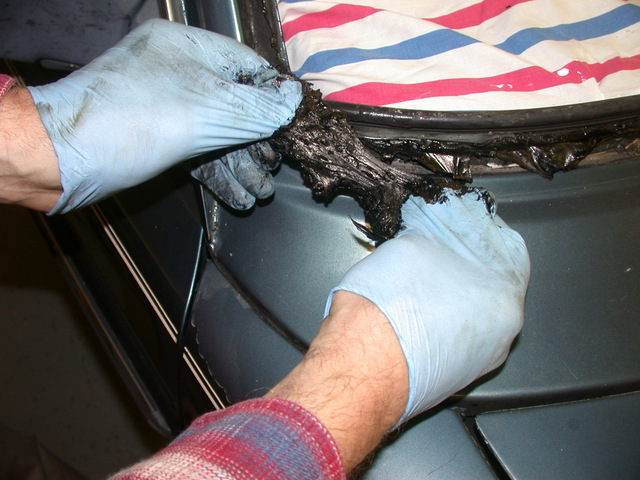
My process, once the old glass was removed was this:
1) Peel off what could be grabbed between thumb and forefinger, both urethane and butyl rubber.
2) Scrape using a wooden paint stirrer, mostly pushing the goo softened with a bit of warming until I could pick it off.
3) Using mineral spirits on rags and then paper towels, cleaning the remaining black sealants from the pinchweld area to paint, rust, or metal.
4) Using Scotchbrite abrasive (by hand) remove loose rust.
5) Using zinc phosphate conversion (POR-15 Metal Ready), treat the rusty areas.
6) Paint the pinchweld with POR-15.
7) Call local auto glass installer and have 91+ windshield installed with integral trim.
So, now it has been 5 more years. The paint's clear coat is long gone, but the new glass is clear. The interior and fuse panel is dry and the electronic gremlins absent.
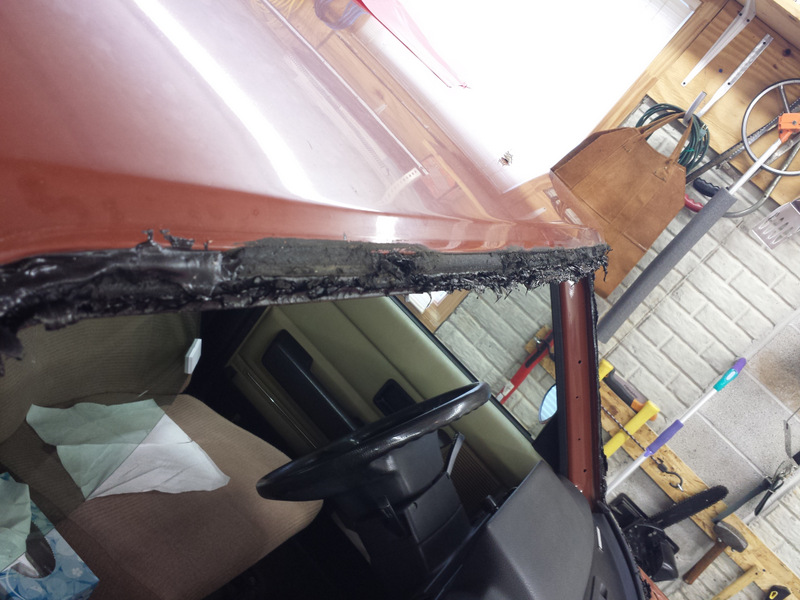
The ugly evidence


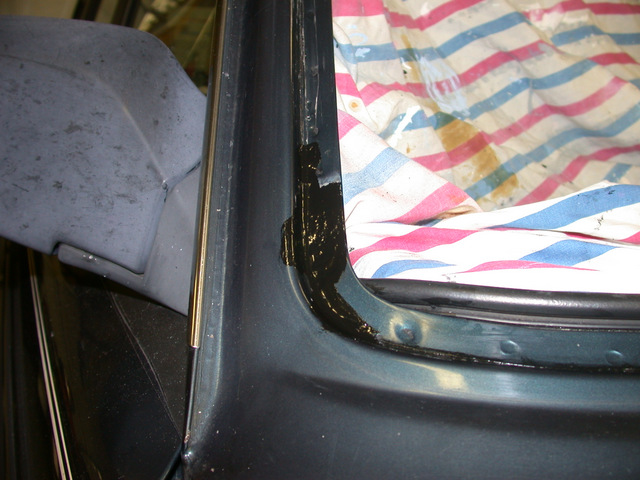

The $200 improvement
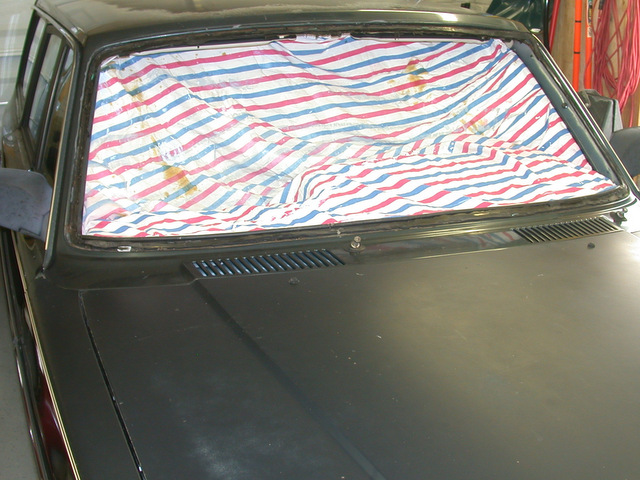
1979 244 : Loose Trim Fix Gone Wrong
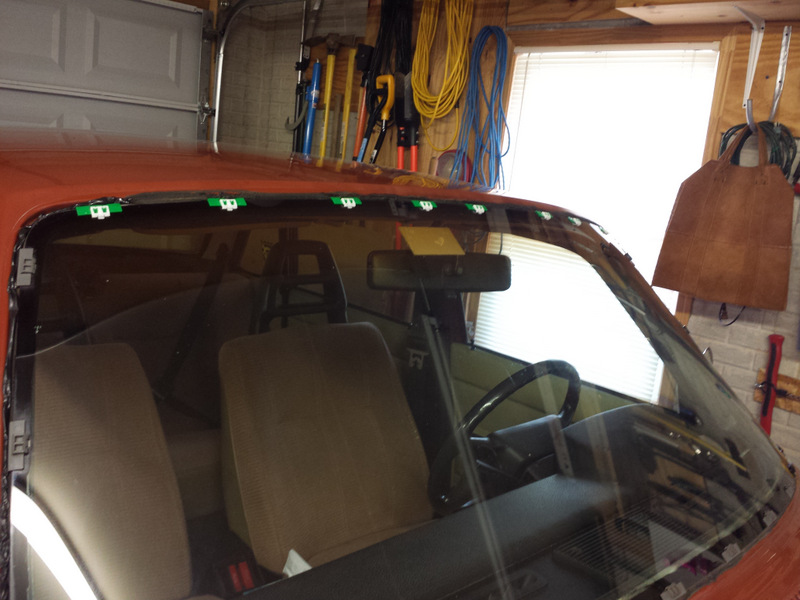
In November of 2000 we purchased this red-brown 1979 244 from the son of its original owner. Then it had 118K of experience, so with 160K in 2017 you might say it has been babied. After returning from 1800 miles of interstate driving, I noticed the anodized aluminum trim had lifted from a couple more clips at the top of the windshield. It had been loose, but now, with this progression, I worried it might catch a gust of wind added to the 70 mph on the road and I'd lose the entire thing.
It is hard to see under the trim, with the high contrast and glass reflections, but being determined to fix this, mirror and flashlight put to use, I judged only 4 of the eight clips were still mated to the trim at the top. Having had the experience of urethaned-in clips on the wagon (story above) I imagined I'd have a chance to dig these clips out of the butyl and replace them without disturbing the glass mounting. This car had never leaked.
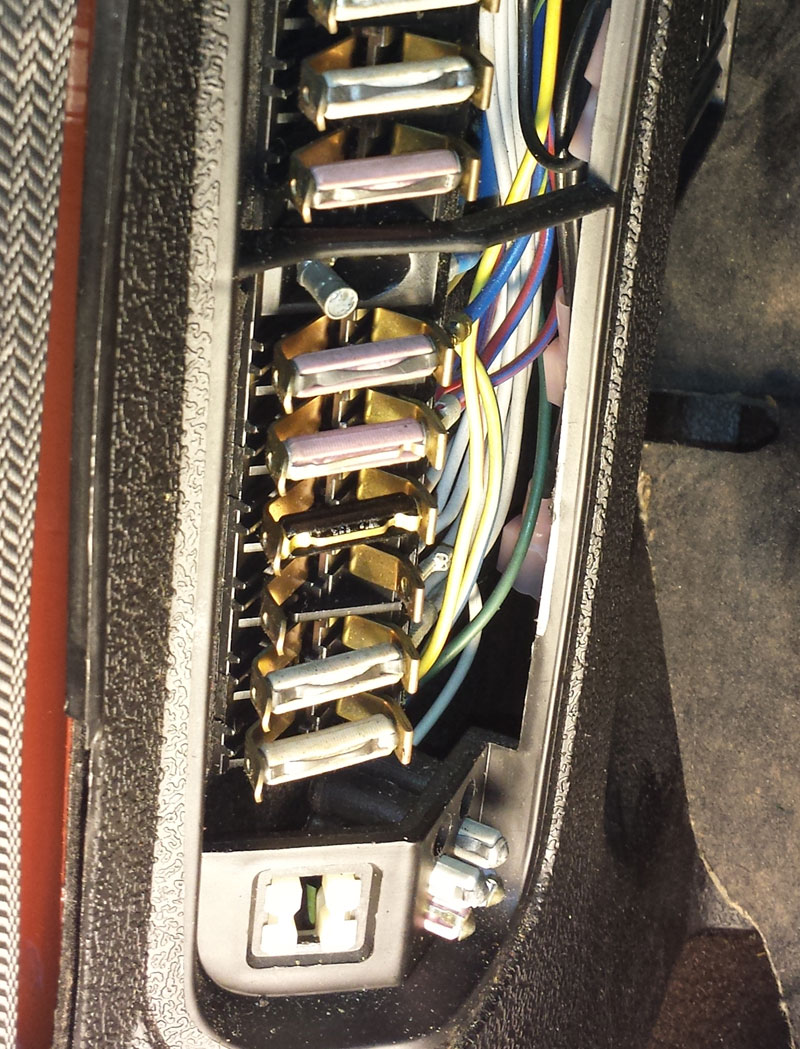
Imagine a 240 fuse panel without a spot of corrosion!
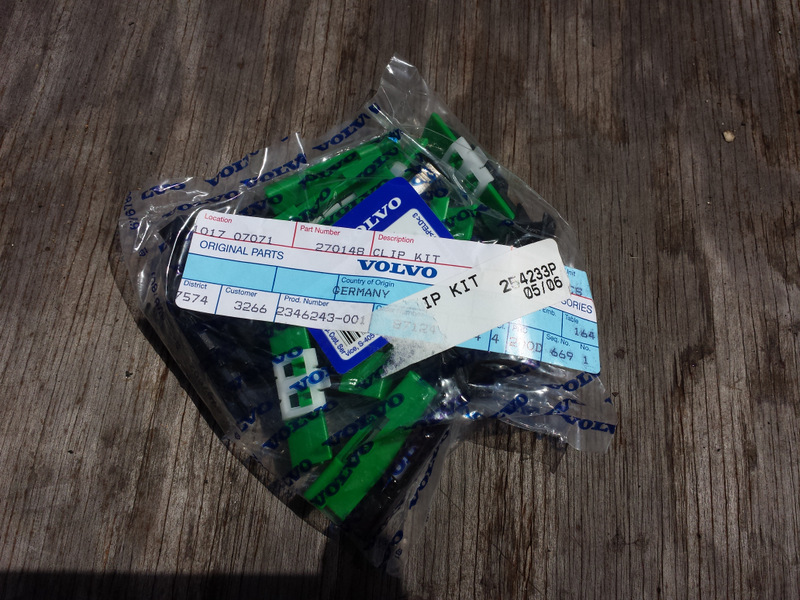
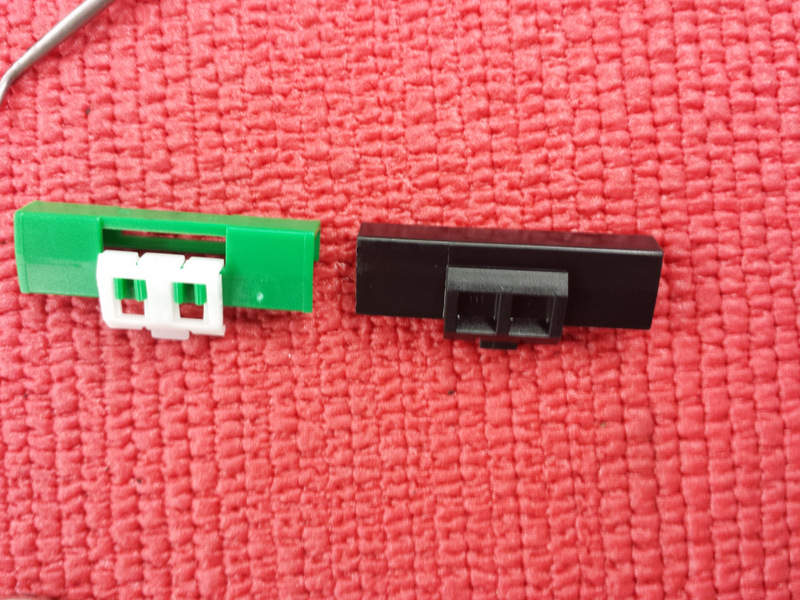
I ordered and received a clip kit (p/n 270148) from a dealer, more or less surprised it cost little more than it did when I first ordered one 15 years ago. When it arrived, I pried the rest of the trim from the clips, dug the broken clips out of the butyl, replaced just them, and touched up the sealant around those I disturbed. Trim went on snap, snap, snap, with the heel of my hand -- until I got to the lower right corner. No snap. Ten feet away hangs the rubber mallet. Snap. But, it had a slightly different snap sound to it.
There were a few moments of "how stupid could I be" eventually resulting in being determined to make this a proper lesson. I had to put it back right, and not just slap the 91+ replacement on it, because every time I looked at that strange omission to the bright trim motif so much part of the 70's cars, I'd be reminded of that rubber mallet. So I set out to learn how I could replace the original glass with the original replacement.
Before calling the glass installer who set the 91+ version into the '89 wagon, I pondered this post on an auto glass industry forum page:
Volvo Hack Job
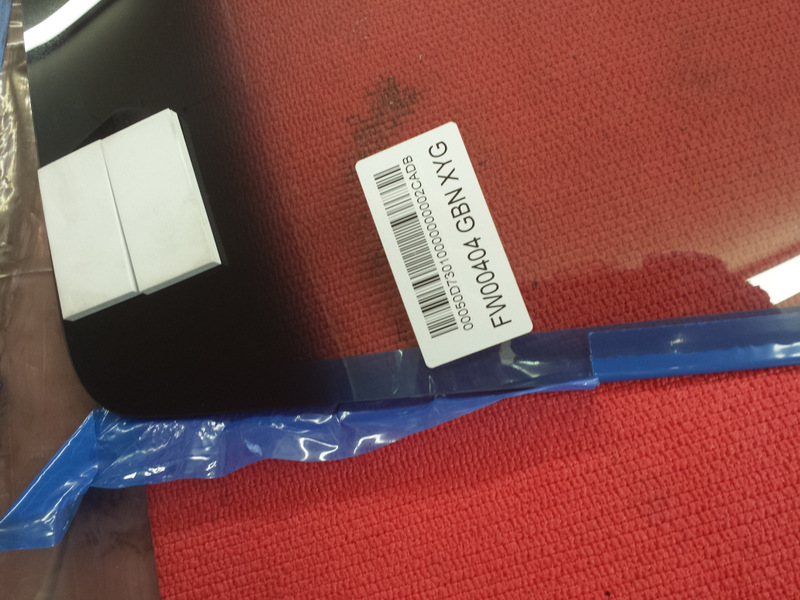
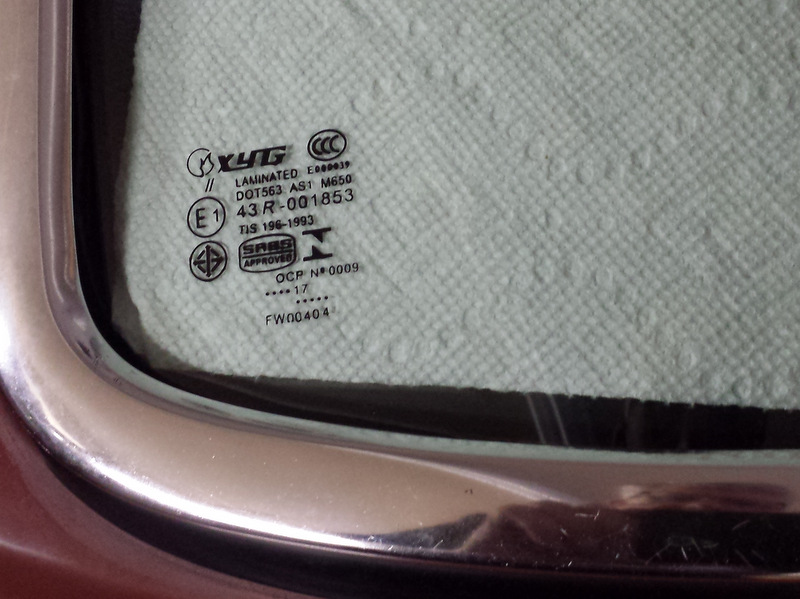
If the link no longer works, the gist of it is the glass people will not guarantee a clipped in trim set in urethane, and urethane is the only adhesive they will use. So, instead of the old problem, getting the glass people to believe an FW667 with integral trim will fit '90 and earlier 240's, is solved. But that's all they'll do now. I called Brian at Auto Glass Heroes, who did the installation on our wagon six years earlier. He understood what I needed, but confirmed he could not do a tape job (liability) but would be happy to deliver a FW404 for me to install. It took $170 and one extra business day for him to get one from a supplier of classic auto glass. It came with an aftermarket clip kit, and the invoice had it priced 1/2 what I'd just paid Volvo. That and $25 to the local auto paint store for a 3M 3/8" tape kit (08612 Window-Weld Ribbon).
While Brian was here with the new glass, I showed him what I'd done. He explained to me the reason for it: the rubber part of the trim shrinks and curls inward. It gets stiff with 30-40 years experience, pushing away from the body. He agreed the profile of that rubber molding was not to be found new, and suggested I put the trim on the glass before setting it.
Trim Removal
I started with the exterior trim. Pried it up from the glass side to snap it off of the clips. This jibes with Volvo's instruction; I used the business end of an ice scraper.
The interior trim consists of the two covers for the A-pillars, the top trim transitioning the headliner to the glass, and a soft rubber cushion running the length of the bottom of the window, forming a dam for the butyl in the bottom, separating the window frame from the dash.

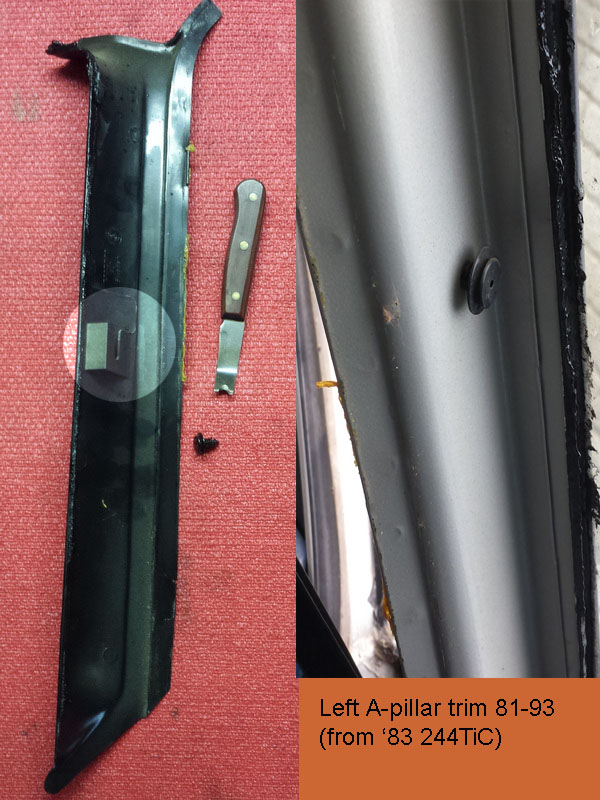
The pillar trim on the '79 has three push pins securing it to the pillar, which are obvious. In our later cars (83 and newer) the trim does not have any external fasteners, but is secured under the U-molding protecting the door frame pinchweld. At the center, it is held to the A-pillar inside by a double-headed push pin which is a little tricky to maneuver both in removal and reassembly. It may help to know the trim must be moved lower to disengage it from the pin, but to do this, I believe the dash would need to be removed. Also, I believe the newer trim is less sturdy than the older style, so it needs extra care in handling.
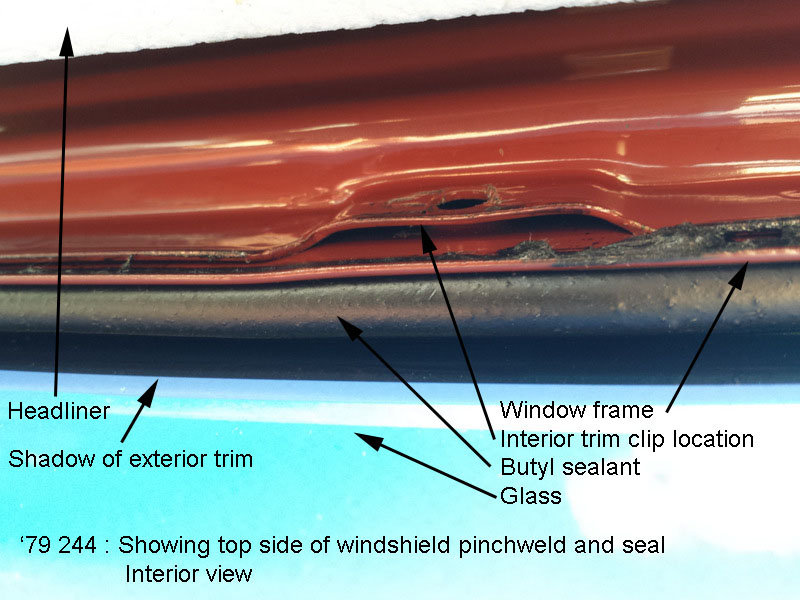
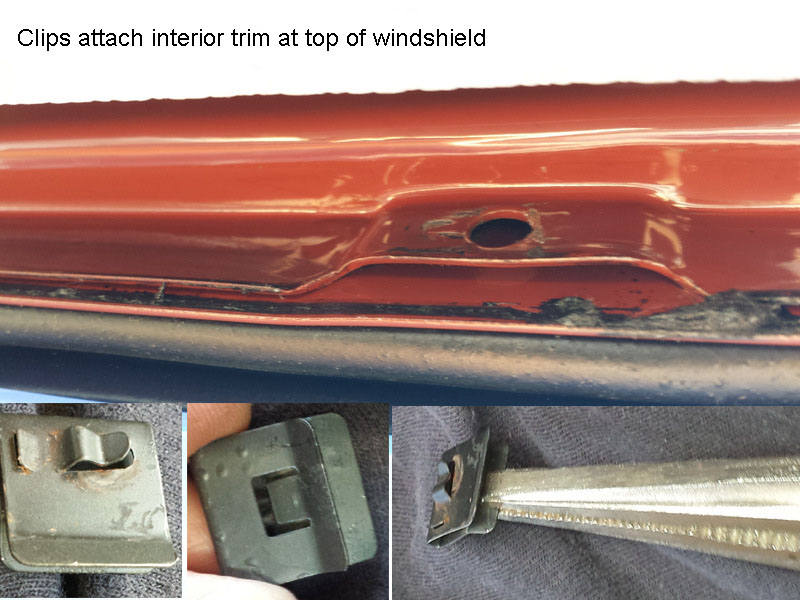
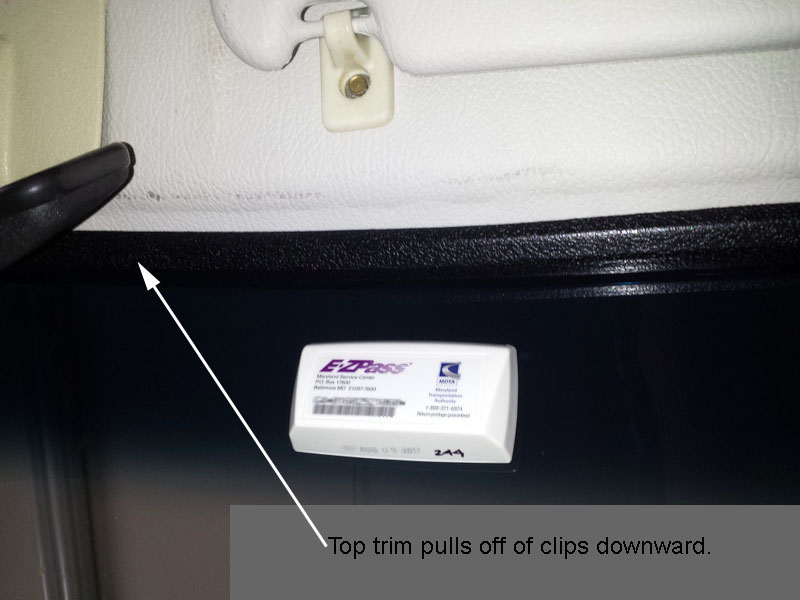
The interior trim across the top of the window covers the edge of the headliner and upper pinchweld. The trim in a wagon is held by screws. In the sedan it is fastened by spring clips and can be worked off of those clips by tugging it away from the window frame. If the clip comes with it, or is very loose, it could be tightened and replaced in the opening made for it in the pinchweld.
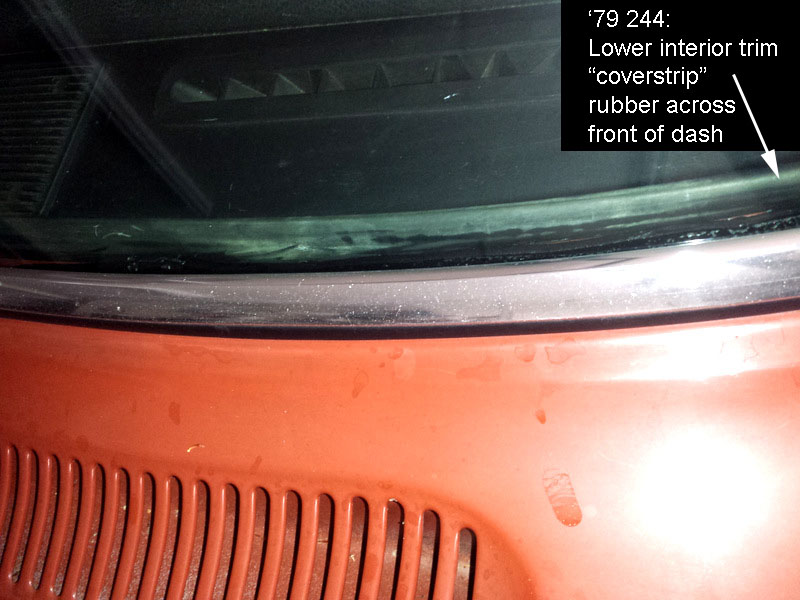
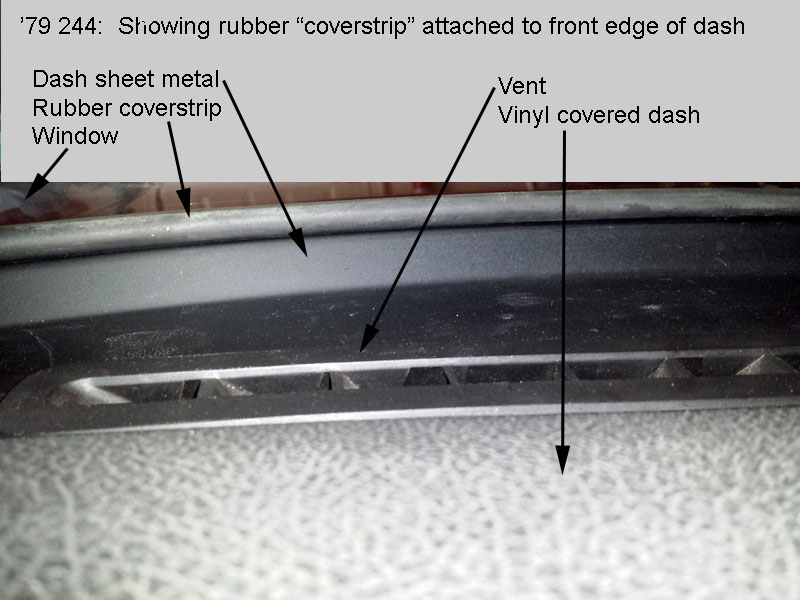
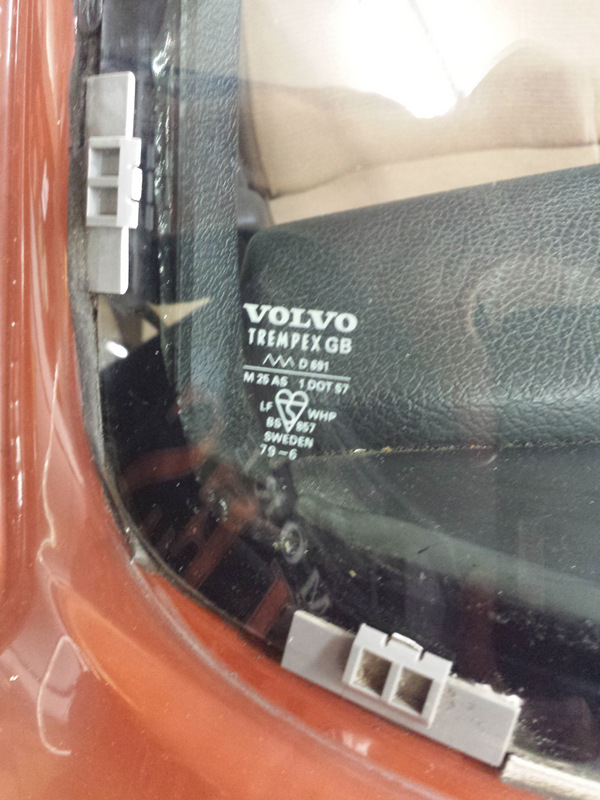
Below the window is a soft rubber piece separating the dash from the window frame. Pulling it from the '79, it left pieces of its adhesive behind, but mostly that adhesive was dried and powdery. In Volvo's body manual this is referred to as a "coverstrip" and is part of the dash drawing.
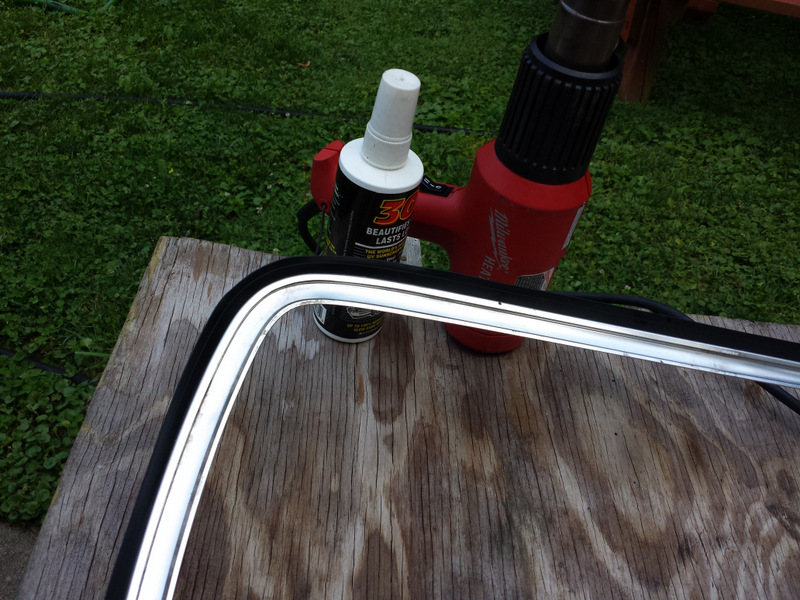
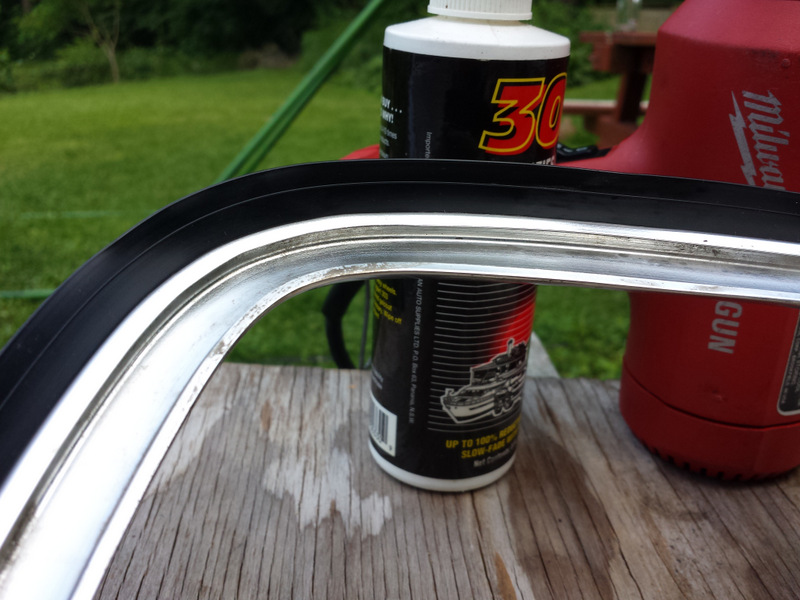
All this trim will need to be cleaned. Testing the amount of heat needed to make the corners of the exterior trim pliable.
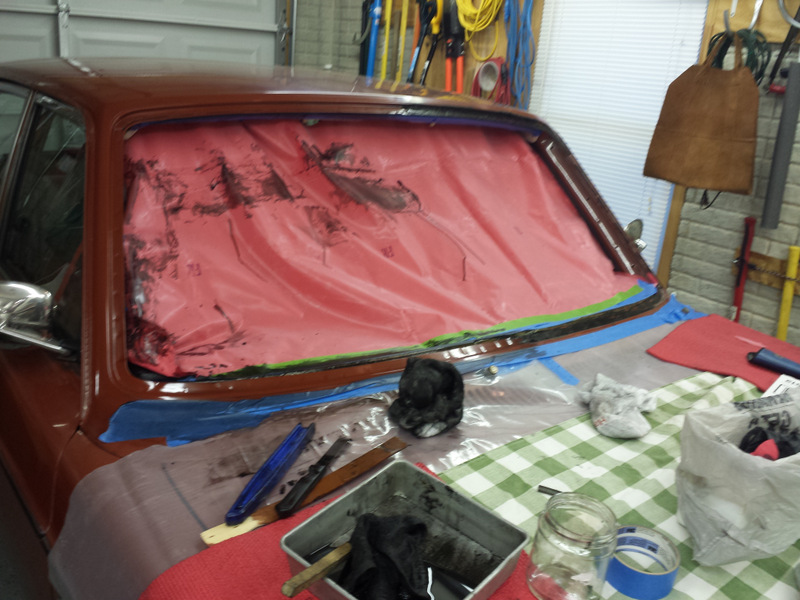
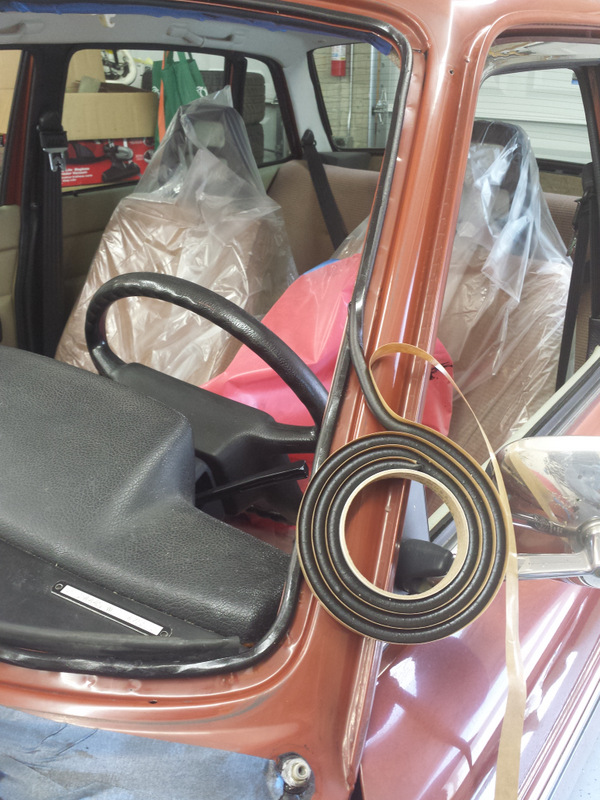
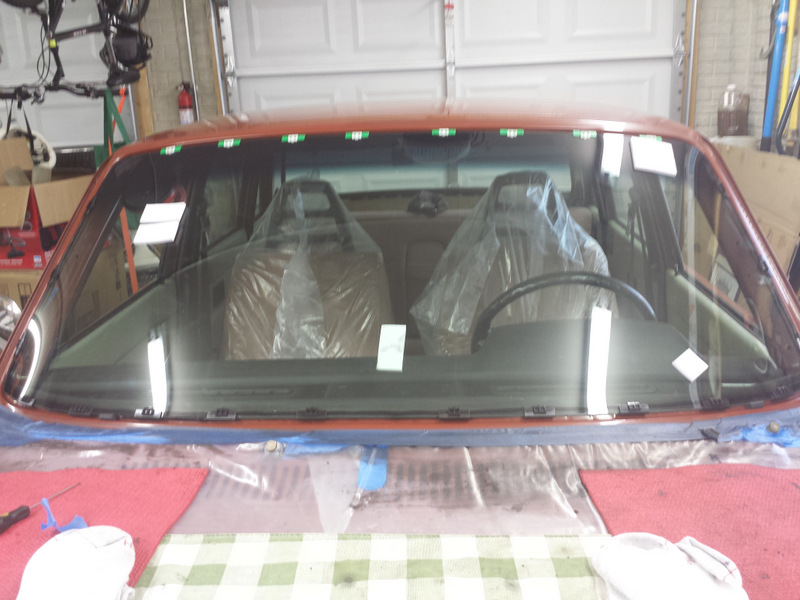
Protect the Interior from Butyl Mess
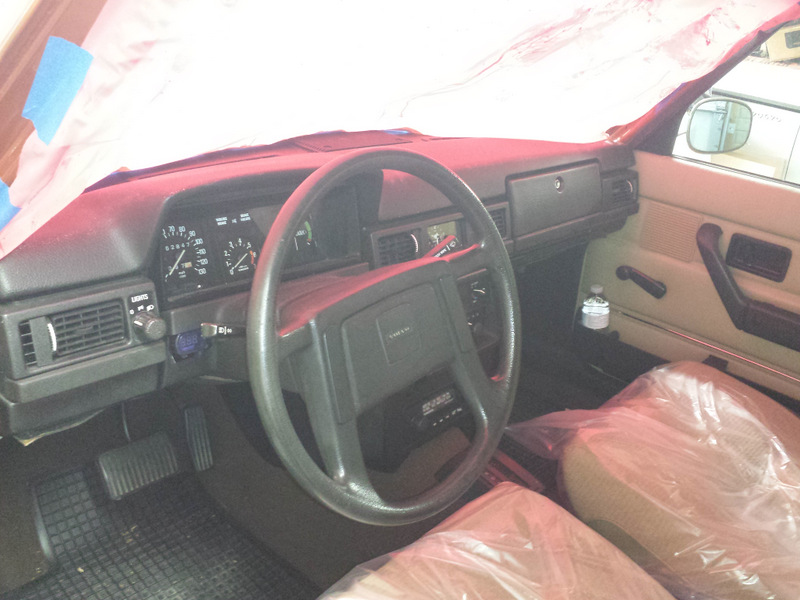
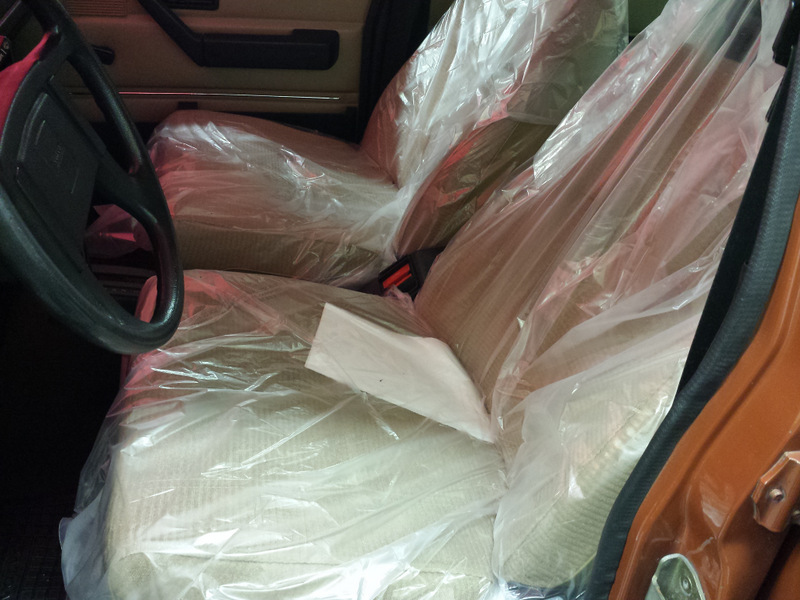
I could have done a better job. Cleaning the pinchweld throws a lot of butyl around. You don't want this stuff on your seats, on the carpeting, on the garage floor, or in your home. Bad enough you have to get it on yourself. Check your shoes. Tape and mask. Bag the chairs.
Windshield Removal
Again, this is about my experience. Yours could vary considerably here; that is why there are so many clever tools used by the auto glass trade to make removal something less than a "snap." I parked it in the sun to let it warm, just as I had with the 89 wagon. Got inside the car, put my feet on the windshield and exerted pressure until I could feel one corner begin to give. Moved the pressure to balance it, not that I had any need to save the old glass, but I wanted it to come out in one piece. Even with the crack (progressed edge to edge by now) the laminated original equipment glass came loose in one piece.
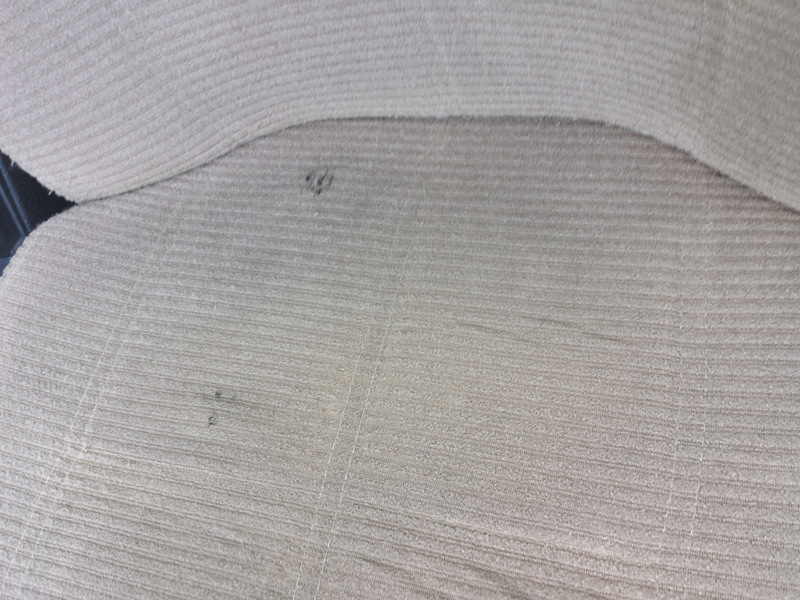
A problem occurred because I had not thought about how to catch it. Sat in the chair with the glass hinged by butyl rubber on the bottom and goo dripping from the top and a door in the way between me and catching it. I found the trim tool (a ground kitchen knife) still on the dash, so I used it to prop the window while I climbed out. Now, alongside the left fender, I could grab the glass and wrestle it free of the remaining butyl holding the bottom of it. The trim tool popped out and landed squarely on the driver's cloth-upolstered chair. Result: two more notes on the "Don't Do This" list. Have a helper available, protect the upholstery.
It took 15 minutes with paper towels and brake cleaner until the towels came up clean.
Clean the Pinchweld
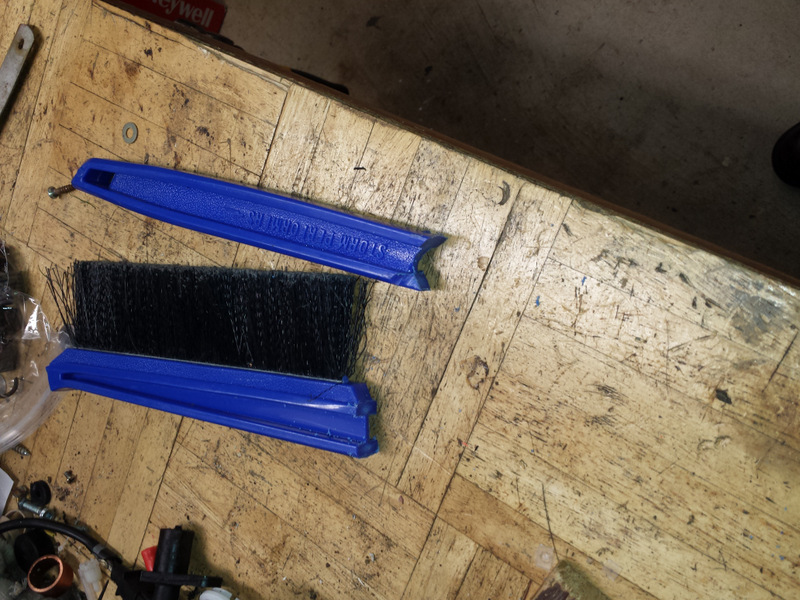
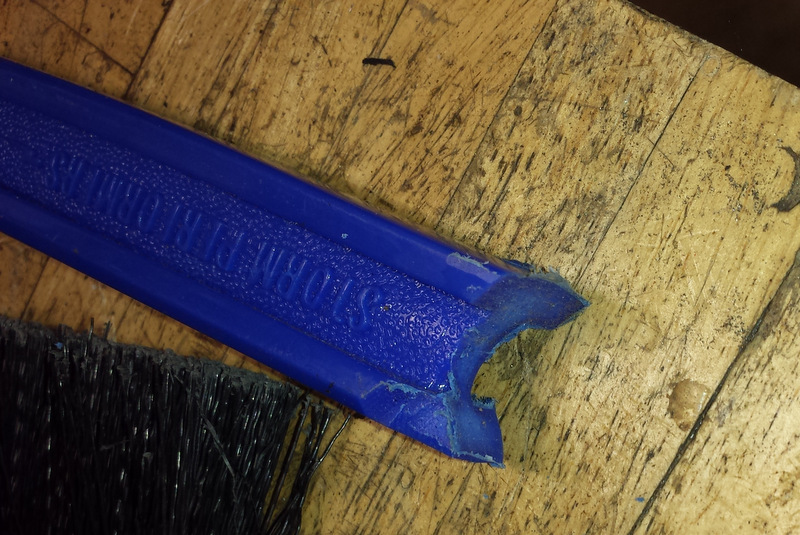
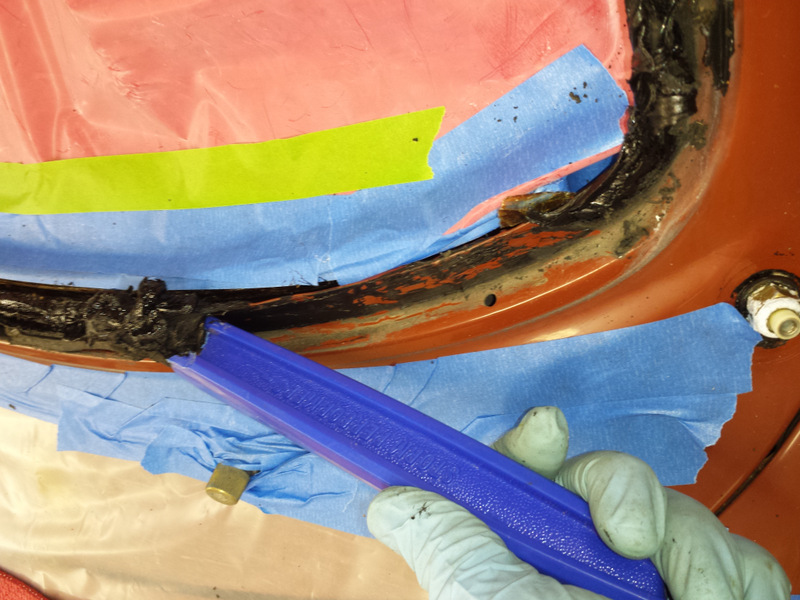
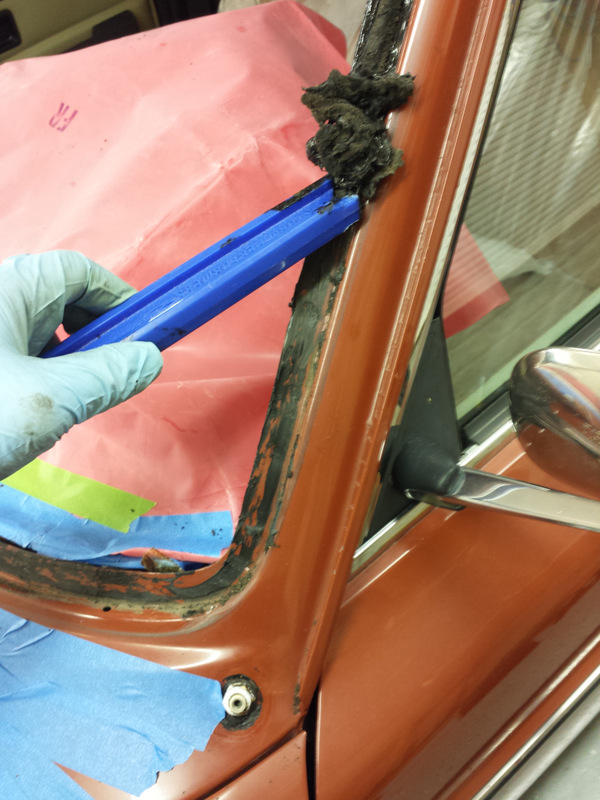

Last time I did this, I used a paint stirrer and mineral spirits. This time I sharpened an ice scraper handle to better fit the pinchweld space and better stand up to the pushing and shoving without having to chase it with a heat gun quite as much. Process improvement, I think. I can see why the average glass shop doesn't get this job completely done before squirting the urethane, as was the case with the '89 wagon's previous ownership. I spent two evenings on this, even though no rust treatment was indicated. If it were required, I'd do as I did with the wagon, using POR-15, as described above.
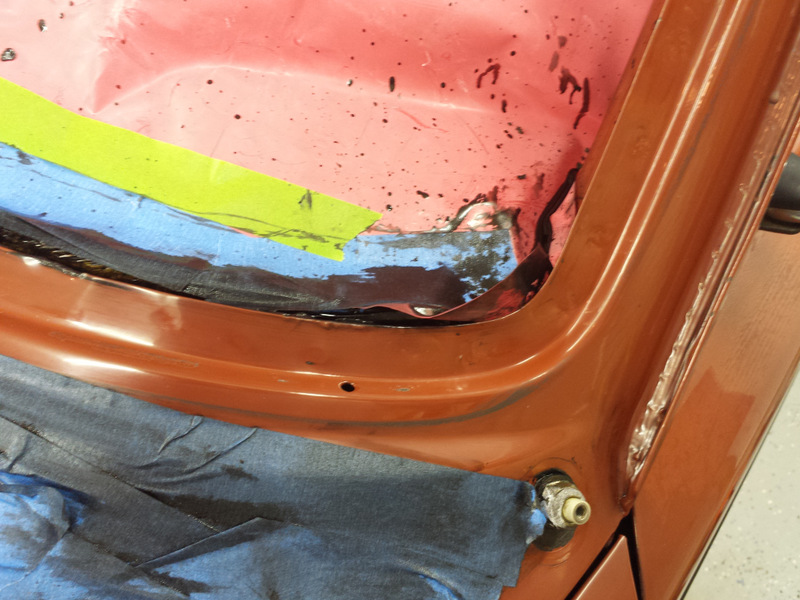
After cleaning up all of the masking paper, plastic, and tape, I positioned the soft rubber spacer (bottom trim) between the dash and the window frame. It fit tightly, although it was originally attached to the front of the dash with adhesive. In Volvo's body manual this is referred to as a "coverstrip" and is part of the dash drawing.
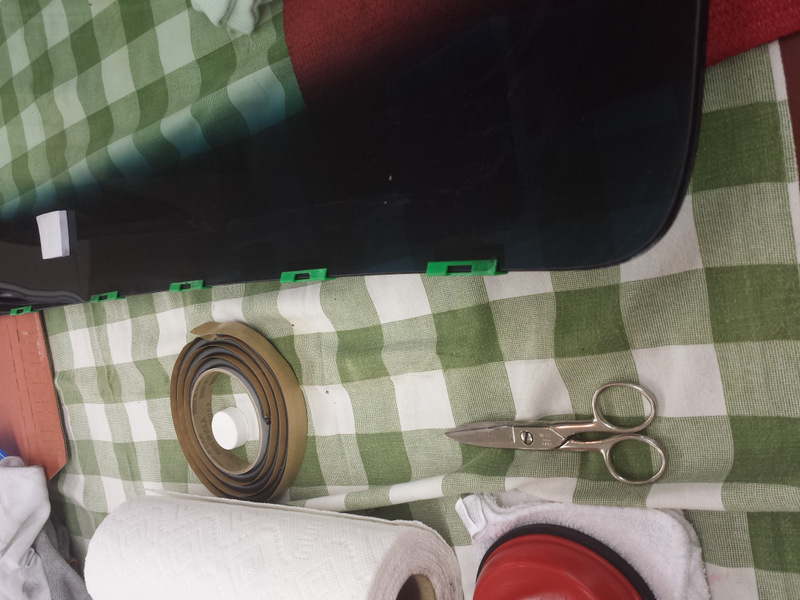
Prepare and Set the New Glass
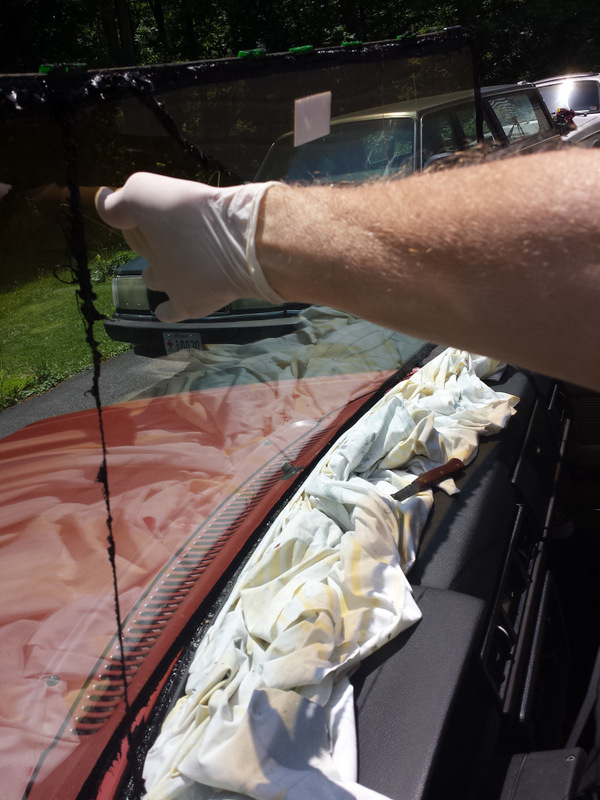
At this point I delayed the job for a couple weeks (luxury of having a fleet of 240's) until my brother was here for the weekend. Placed some towels on the hood to support the glass and placed the clips around the edge, and the spacing blocks at the bottom of the frame. Brian's advice to attach the trim with the glass free seemed as if followed, would not have allowed me to view the placement of the glass or the compression of the seal bead, so I chose to put the trim on after the window was installed. My consolation? I would not be tempted by the rubber mallet.
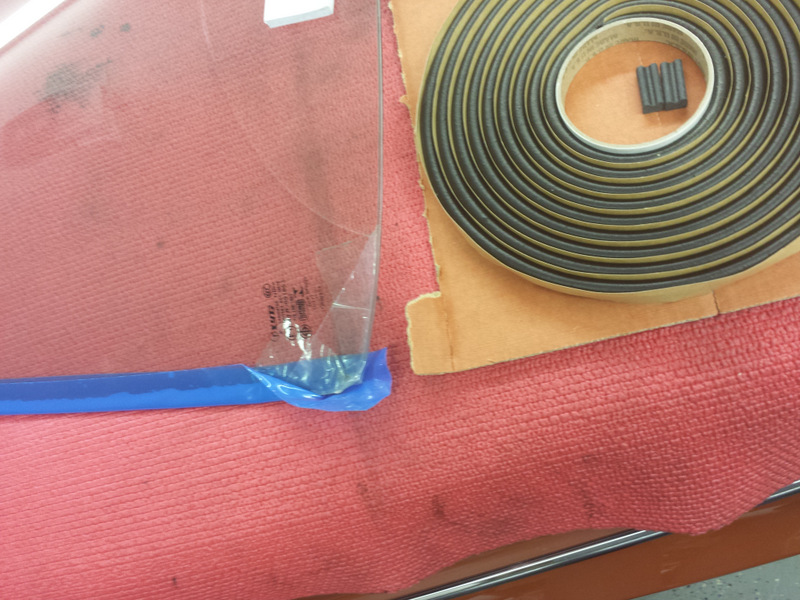
Next, I did one final wipe of the window's edge and the pinchweld with isopropyl alcohol befre we rolled out the butyl tape, keeping its inner edge just inside the inner edge of the pinchweld.
The suction cups I picked up hastily were not intended for glass handling, but for dent pulling. The Autozone clerk warned me someone else had dropped his glass using them. I tested them with varying degrees of wetting and dry, and sure enough, I couldn't trust them, but I have no idea why. Still, I attached them, but to the inside surface, and my brother and I used the open window get control of both sides of the glass and set it perfectly on the freshly laid bead of butyl.
We applied broad pressure to see the sealant squeeze out uniformly around the perimter and the window's surface approach flush with the exterior body, swapping sides to be sure we both saw the same goals. I inspected from the inside, test pulling on the suction cups, and checking the perimeter of the pinchweld for full contact with the butyl. There were some low and high spots in the frame which the butyl filled perfectly.
Replace the Trim
First, we snapped the exterior trim to the clips, and this time, working at the corners, I used the heat gun to gently warm the rubber part of the trim to make it pliable. The trim can adjust somewhat, as the clips are not entirely embedded in the butyl. The moveable clips along the top make up for any dimensional changes vertically, and the joints in the aluminum at center top and bottom allow adjustment horizontally.
My brother and I felt comfortable to have a beer, and move on to other things, so I dealt with reinstalling the interior trim about a week later. Replacing the top trim is tricky for me because of the lighting and contrast. Old eyes can't do HDR. Neither can my phone camera. The tool that worked best for me is the Harbor Freight edition of the long-nosed vise grip pliers. With those I could insert the clips into their places in the pinchweld before pushing on the strip of plastic that makes up the upper trim.
The side trim is simple enough to snap in place with push pins.
End Result
Always, the recommendation to water test for leaks appears. We experienced quite a gully washer about a month following this work, so I took the opportunity to inspect under the dash and floor covering. So far so good, but success with these cars takes time to measure.
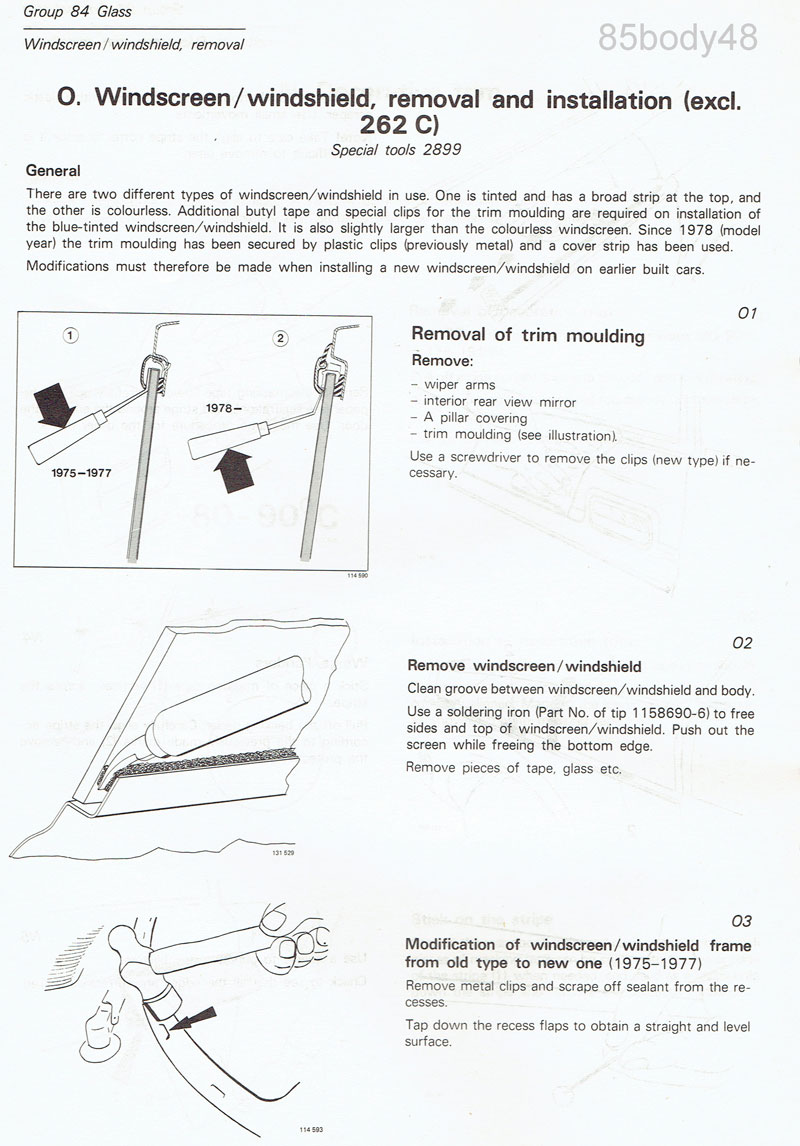
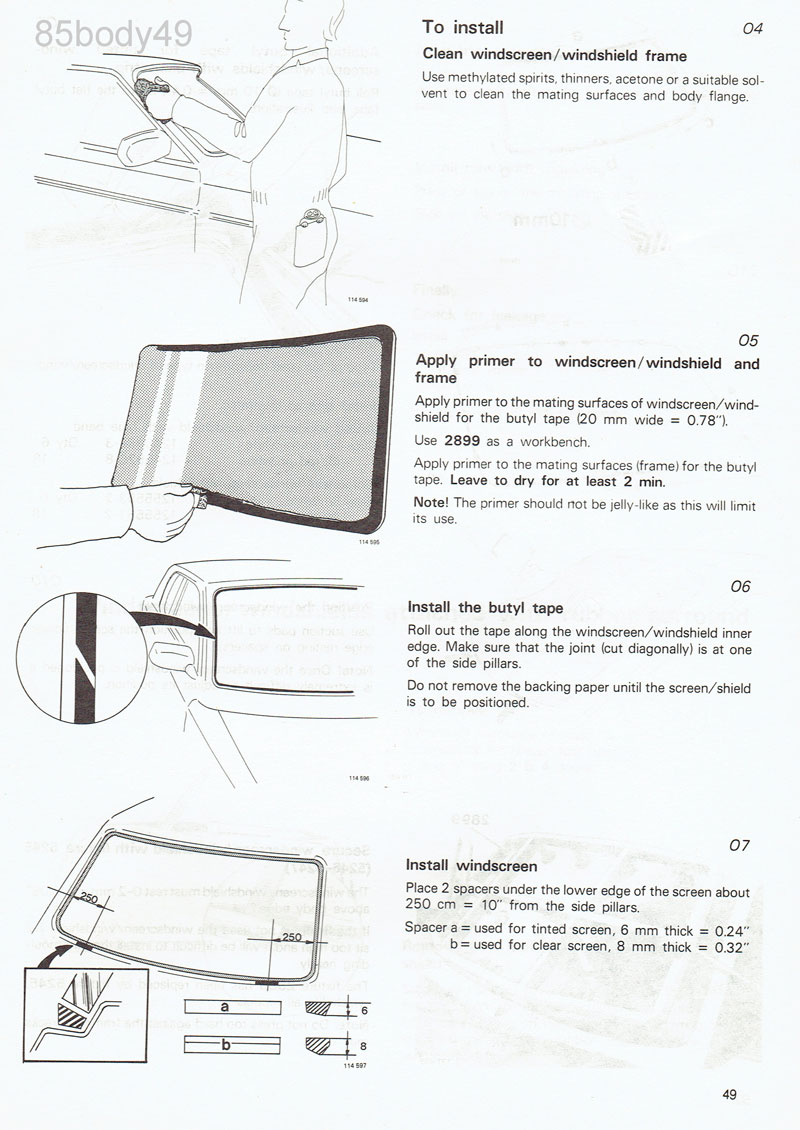
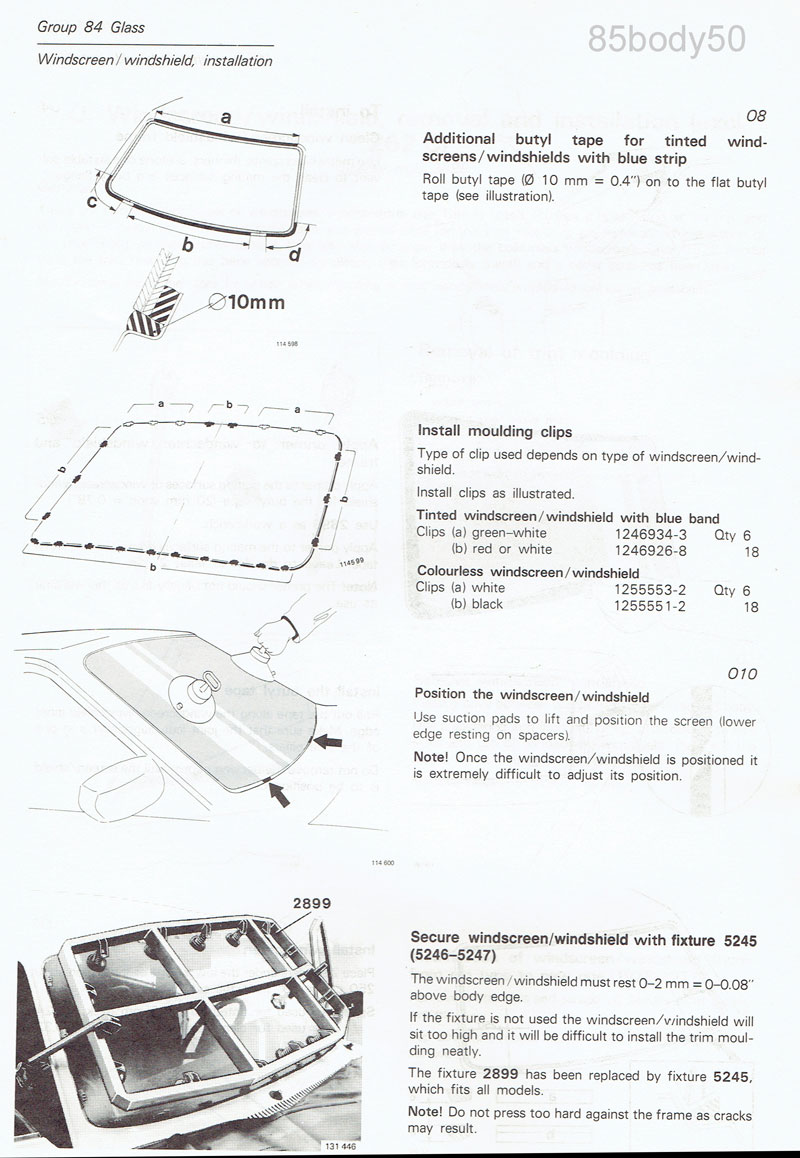
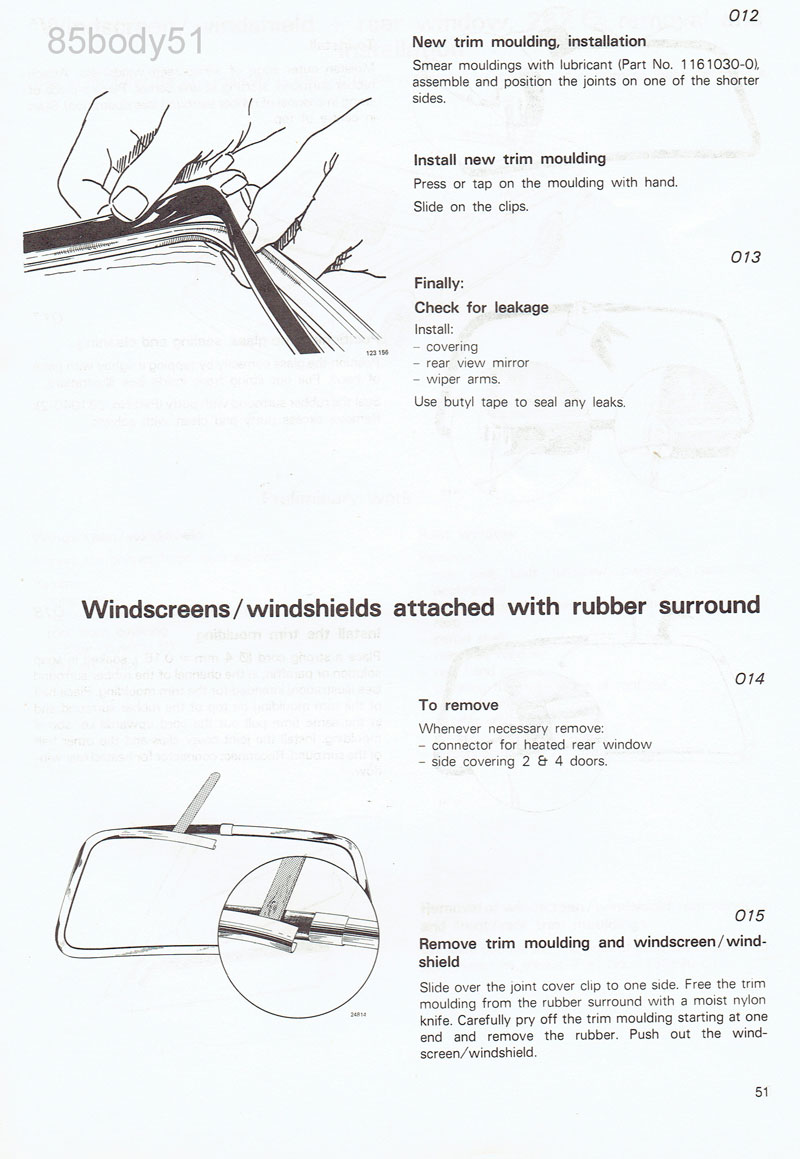
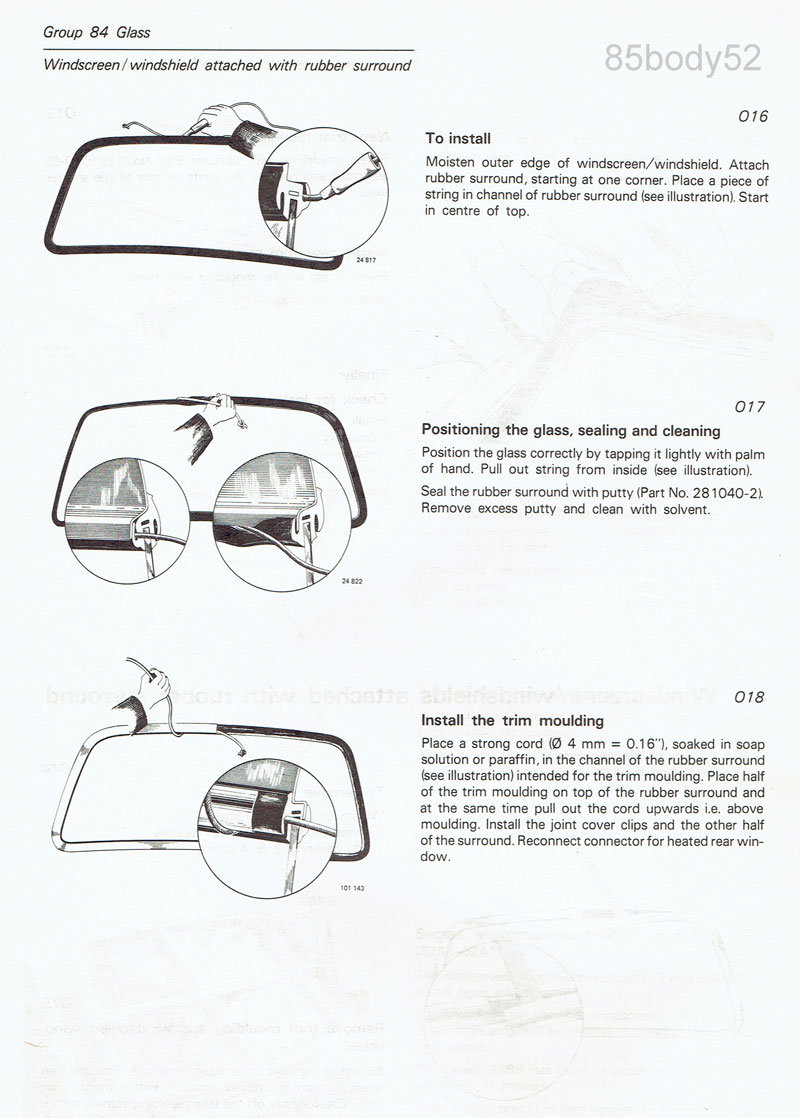
Volvo's Pages
Don't Do This List
- Don't try to bury new clips in old butyl. Dig out and add some new sealant.
- Don't be lazy only replacing broken clips. Replace them all.
- Don't use a rubber mallet to seat trim near the lower corner!
- Don't push old glass out without something to prop it or someone to catch it.
- Don't forget to protect seat upholstery.
- Don't use weak, thin gloves with butyl.
- Don't get butyl on the floor to track into the house.
- Don't skimp on firmly attached masking.
Return to links index